Spring is coming… I am so excited. It is my best season. I love seeing all the flowers emerging from the soil, so green, so fresh, and so full of life. In Texas, some of the flowers already bloomed because of the confusing hot and cold weather, but this year will be crazy for wild flowers because precipitation rate was high and it seems it always rained on the right time.
Today I will share one of my quick paintings. I was so lazy that I didn’t even clean my palette while mixing the colors on it. I added on top of each other. You can see in the painting how dirty the colors looked instead of being bright.
How y’all doing? I live in Texas and am getting used to their accent. Yee haw!
We experienced all seasons in one week for the last few days. It was summer, spring, fall and winter and today we are back to summer again. Weather is changing so quickly that no surprise everyone is getting sick.
Today I will share one of my old paintings I completed in 2011 I believe. It is a red poppy.
Poppy_Water color_Tulay Yilmaz
They are one of my favorite flowers. They don’t smell that great, flies love them and their leaves fall off really easily but they have a delicate look, and their center is so nicely structured. I especially love running in the poppy fields.
Mom picked this one for me on her way back home from work, but it was pretty much dead when she gave it to me. I did a quick sketch and painted it the other day. I love how deep the colors of the leaves turned out.
Today is another day of sharing an old painting of mine. I don’t know how long I will be able to do this, because there is not much left. I better create some time to do some new paintings. I started a new job almost a month ago. I am pretty busy with experiments, trainings and meeting new people. When I get home, I am mainly pretty exhausted. Hopefully I will get used to the routine soon enough to have some time for water color paintings.
Red Onion_Water color_Tulay Yilmaz_2010
I painted this onion in 2010. This was my last painting at the course. I was taking the course after school, so I was going home pretty late and when I get home I wasn’t working on them. When the course ended, I stopped working on it. Otherwise, it could definitely have a couple more layers to make it darker.
The original painting is in Turkey at my parents’ home on the kitchen wall. Maybe I should paint another onion. Hmm… I will think about it.
Today I am sharing a painting of mine that I love eating and missing a lot in US. Yes, it is hazelnut! Since I came here, I found it in a few store which are imported from Turkey. However, they never sell them in their shells. They are cracked and roasted. While it is better than nothing, I still miss cracking them myself and eating tons of them. Especially the fresh ones… Yumm!
Fresh nuts were always my best treats. Although I love chocolates or chips, I wouldn’t trade fresh nuts to any of them. My awesome mom knew that, and she would make sure to buy me a full bag of fresh hazelnuts when the season came.
I love you mom! I love you hazelnuts!
Anyways… Here are the hazelnuts that I am nuts about!
Hazelnut, Watercolor, 2011
This was a pretty quick painting. I remember, we were in botanical illustration class, and I finished my project earlier than others. Our instructor gave me these nuts to paint while I was waiting for others.
This painting can be taken as an example to small projects. You know, sometimes we just don’t want to work on big paintings, but at the same time we feel guilty that we are not painting. Maybe finding some nuts around, or small leaves, little flowers and working on them can help to stop the uncomfortable feeling of delaying painting to another day.
I hope this is a useful tip and will help you to look around to find a small object to paint.
Today is another day for sharing one of my old paintings. I did this a few years ago. I remember a friend of mine commented on this ‘This thing is more walnut looking than a walnut!’ which was so sweet.
While I was working on this piece, I was scared of darkening the shadows. When I was done, it was looking a lot more lighter, but my instructor warned me to darken the shadows and told me not to be scared. So I did what she said, and walnut turned into 3D all of a sudden.
Walnut_Watercolor_Graphite_Tulay Yilmaz_2011
I think what makes a painting the most realistic are the right application of the shadows and finding the right colors to paint.
I hope you like this painting.
Walnut is one of my favorite nuts by the way. I can crack and eat a huge bag of fresh walnut without even care a bit that it is coloring my fingers green. It is sooo yummy!
I am kind of busy on these days, I couldn’t work with watercolor pencils lately. Whenever I find time, I want to work on new pieces and share my thoughts about watercolor pencils.
I am still experimenting with the new watercolor pencils. Since there are only 12 of them, I have to use other media to be able to find the true colors of the subject I am working with.
Yesterday I saw a mushroom photo. It is a wallpaper, I don’t know who took the photo. I wanted to share the link but it is broken somehow. If you make a Google search as ‘piccry mushroom’, you can see the photo I used as reference. I also set it as featured image at the top of this post. I want to thank to the person who took this photo. It was looking so jolly that I decided to paint it.
I especially loved how the stem/stalk looked at the end. I used Crayola colored pencils, Faber Castell watercolor pencils and Faber Castell graphite sketch 4B pencil. I finished this in four hours while watching a show. That’s why it is not detailed that much.
I am still happy with watercolor pencils. It doesn’t turn out as realistic as watercolor paintings but still, it is really fun to work with.
I am planning to keep trying these new pencils with different subjects then I will write a review about them.
I am super duper happy today. Yesterday sweet sister Erica sent some presents from South Korea. She is working as an English teacher there.
Two presents were related to flower arrangements. One is a notebook and other is a fan. Flowers were pressed.
I used some tacky glue and arranged them the way I wanted. Here they are;
After completing these, I jumped over my new watercolor pencils. I was so excited to try them that I used the same outline paper I used for my previous watercolor work which is balloon flower. It turned out meh…
Watercolor pencils_Balloon flower
The above picture is on Strathmore Watercolor paper, acid free, Cold press, 140 lb (300 g). The surface of the paper is not the greatest for a smooth painting.
What is magical about watercolor pencils is, they both work as pencil and watercolor (The name is watercolor pencil, daa!). You color your drawing with pencils first and then use a brush by dipping it into a little bit of water and go over the pencil painted area. They smoothly move on the paper and spread on a big area.
I learned that, as we were waiting for one layer to dry in watercolor to apply the other layer, you should wait for watercolor pencils to dry too. Otherwise, when you try to paint over the wet area, it leaves scribbles. If you don’t push too hard on wet areas, you’ll be fine though. Good news is, wet area dries so quickly.
Today I was looking for another thing to paint and try my new, lovely pencils more. I was looking through my watercolor notebooks, then I saw my unfinished, ugly Hibiscus. Do you remember it from my previous posts? Click here;
A few weeks after writing that post, I worked on that drawing with colored pencils just to complete it. It didn’t turn out great either. Therefore, I left it again. It seems today was the day to complete it nicely. If I need to remind you the paper for that piece, it is Strathmore, mixed media paper, vellum surface, acid free, wet and dry media, 140 lb (300 g). This paper works perfect for watercolor pencils. Let me show you the transition;
Hibiscus_Transition from colored pencils to watercolor pencils
Isn’t it nice how smooth it gets by the touch of watercolor pencils?
I am so happy with the end product. The colors turned out so vibrant. I can’t wait to try another flower with these new colors. (LOVE YOU ERICA!)
There are things I want to say about watercolor pencils, but I don’t want this post get any longer. Wait for my next post for advantages and disadvantages of this media.
Today I got an e-mail saying “Resistance is a negative force within us that stops us from actually doing what we really want to do.”. This is taken from a book called The War of Art by Steven Pressfield. I didn’t read the book, the e-mail I got was suggesting me to read this book. I have never been a fan of personal growth books, so I don’t know if I will ever buy the book but the sentence above lit the fire today to make me paint something.
I found a picture of a balloon flower. (I couldn’t find the name of the person who took the picture, but I am thanking him/her from here.) I don’t have the expensive material to paint, so instead of hot pressed 100% cotton paper, I used my cold press, dumb, watercolor paper. Colors just stuck on the surface and ends up with a dirty look. I love when the painting is smooth but there is no way to manage it on cold paper or I am not talented enough.
Anyways I was in a mood today that nothing could stop me paint something. I made a promise to Paul’s flower loving grandma a while ago that I will paint something for her. Therefore this painting will go to her.
Balloon flower_graphite
I prepared a detailed drawing of the flower first, then I used a play dough looking eraser to make the lines fainted. I don’t know what is the actual name of that eraser.
After these, I prepared my color. I used winsor, indigo and rose first. It turned out way too dark. Then I prepared a new mixture with only ultramarine deep and rose. This ultramarine deep color is new in my palette. It is a Van Gogh brand which was on sale, that’s why I bought. Normally my colors are Winsor&Newton. They are fairly expensive but even little amounts of paint goes a long way. Anyways, this new color worked with rose and I found the color close enough the picture.
I painted the darkest areas first, left the white areas untouched. It is important to work on the whole picture while painting, to keep the layers equal and balanced. Otherwise, you end up painting one area way too much than the other area.
While painting I was like, I hate you cold press paper. However, when you think about it, it is actually good to have these around. Especially for making presents. I complain a lot about this paper but actually it turned out pretty sweet. I completed this one in 4 hours. Normally a painting can take days. Here is the end result;
Balloon flower_Watercolor
It was a nice, short exercise for me. If you have questions, please write down below. I would love to hear what you think too.
Two days ago we had a huge storm in San Antonio. It was so strong that it shook the house. I love storms, especially in the comfort of a house but this one was a little bit extreme. Lightning and thunder was flying around. The best part about a storm or raining in such a hot climate is, you wake up to new flowers blooming in your garden the next day.
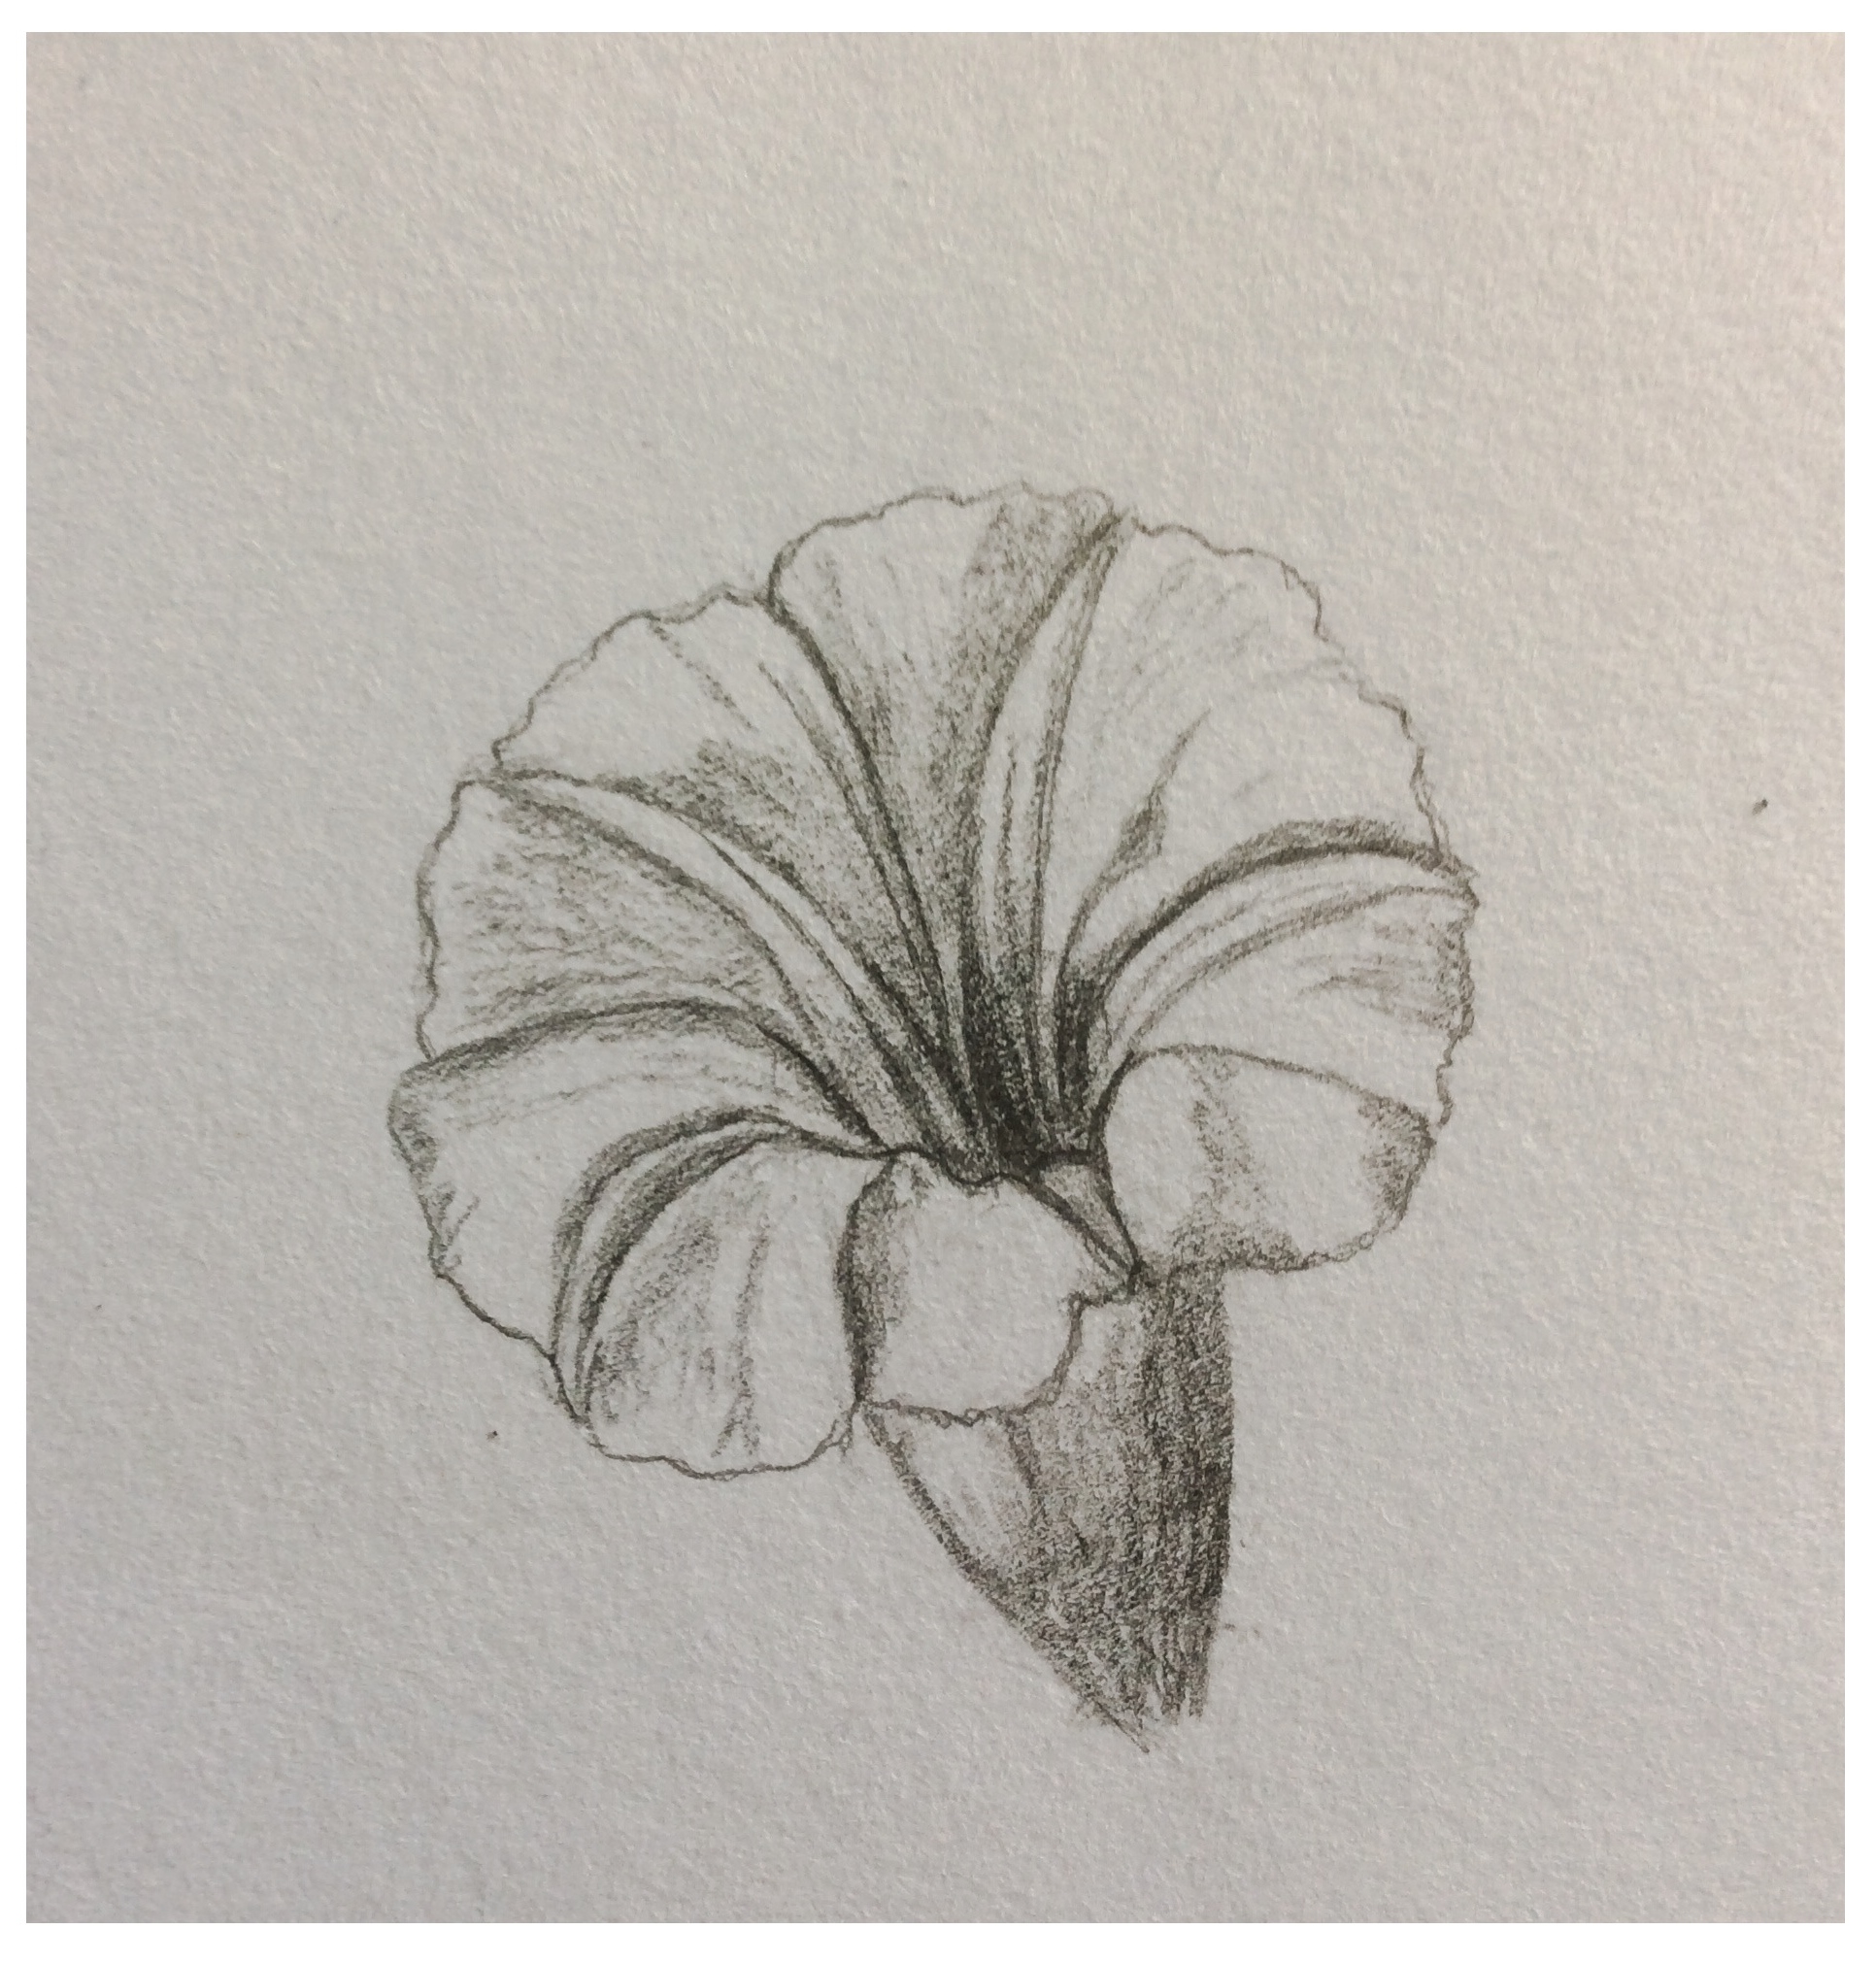
Yesterday I found a member of Convolvulaceae family creeping underneath the grasses. I believe it is called ‘Morning Glory’. When I saw it, I thought, ”Hmm tubular flower, how great to find you especially on these days that I don’t want to draw anything.” Tubular flowers can be really tricky, because you need to give the sense of depth.
I took the flower and drew it around 2.30 pm. Its petals were open. I looked at the flower and realized a star shape in it. You can see that distinct star shape from this lovely photo taken by Beto Frota, I found on Flickr;
This star shape helped me to follow the symmetry of the flower and made the drawing easier. Here how it looked when I was done;
Morning glory_Convolvulaceae_Graphite
In the evening I saw its petals were closed, so I also drew it that way too;
Morning glory_Convolvulaceae_Graphite
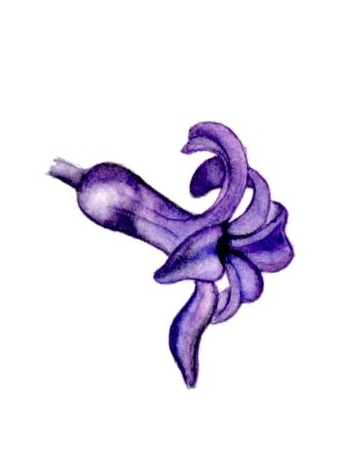
I also found some old paintings that I did with purple Hyacinth. They are also tubular;
Hyacinth_Watercolor_Tubular flower
As you can see in all these three drawings, darkening the center of the flower has a great importance to give the depth to the flower. If you want to challenge yourself, you should try to draw a tubular structure as well.
Yesterday I went to library and got a book named ‘Painting flowers in watercolor’ by Coral G. Guest. I looked through the pictures yesterday and was surprised to see despite the fact that the drawings were not that detailed, the painting turned out amazing. I can’t wait to read the tricks. If I feel convinced, I will try it and share here.
Today I completed an old painting. I believe I did it on January when I got a watercolor painting notebook as a present. I was excited to try a new paper. It is Strathmore Watercolor, cold press, 15 sheets, 6 in. x 9 in. I believe I quit painting because the paper was terrible. It is not smooth, therefore colors don’t expand on the paper properly, they go into holes and dry there which is causing a dirty look at the end. The moral of the story is, if you are doing realistic botanical illustration, don’t use cold press papers, prefer hot press if possible.
Anyways, here is a mountain laurel pod. I used black pencil and pen in this, just to give it a try of different materials on the same paper.
Mountain Laurel pod, water color, pencil and pen
As you can see there is another pod on the picture which is unfinished. You can see the surface of the paper. It is not suitable for my watercolor work, but I still can use this for sketching.
For the one who wonder why this picture is upside down. I kept seeing a bird head on the pod. I still see it when it is upside down, but it kind of helps to draw the attention to the picture as a whole instead of seeing a bird staring at you.
You couldn’t see it? Here is the creepy, smiling bird;
I zoomed it for you, but man! It turned out to be also eating the branch. Darn it! Getting creepier…